These creepy Eyeball sugar cookies are perfect for any Halloween party, movie night or other spooky celebration. These decorated sugar cookies are a soft sugar cookie base topped with soft bite icing.
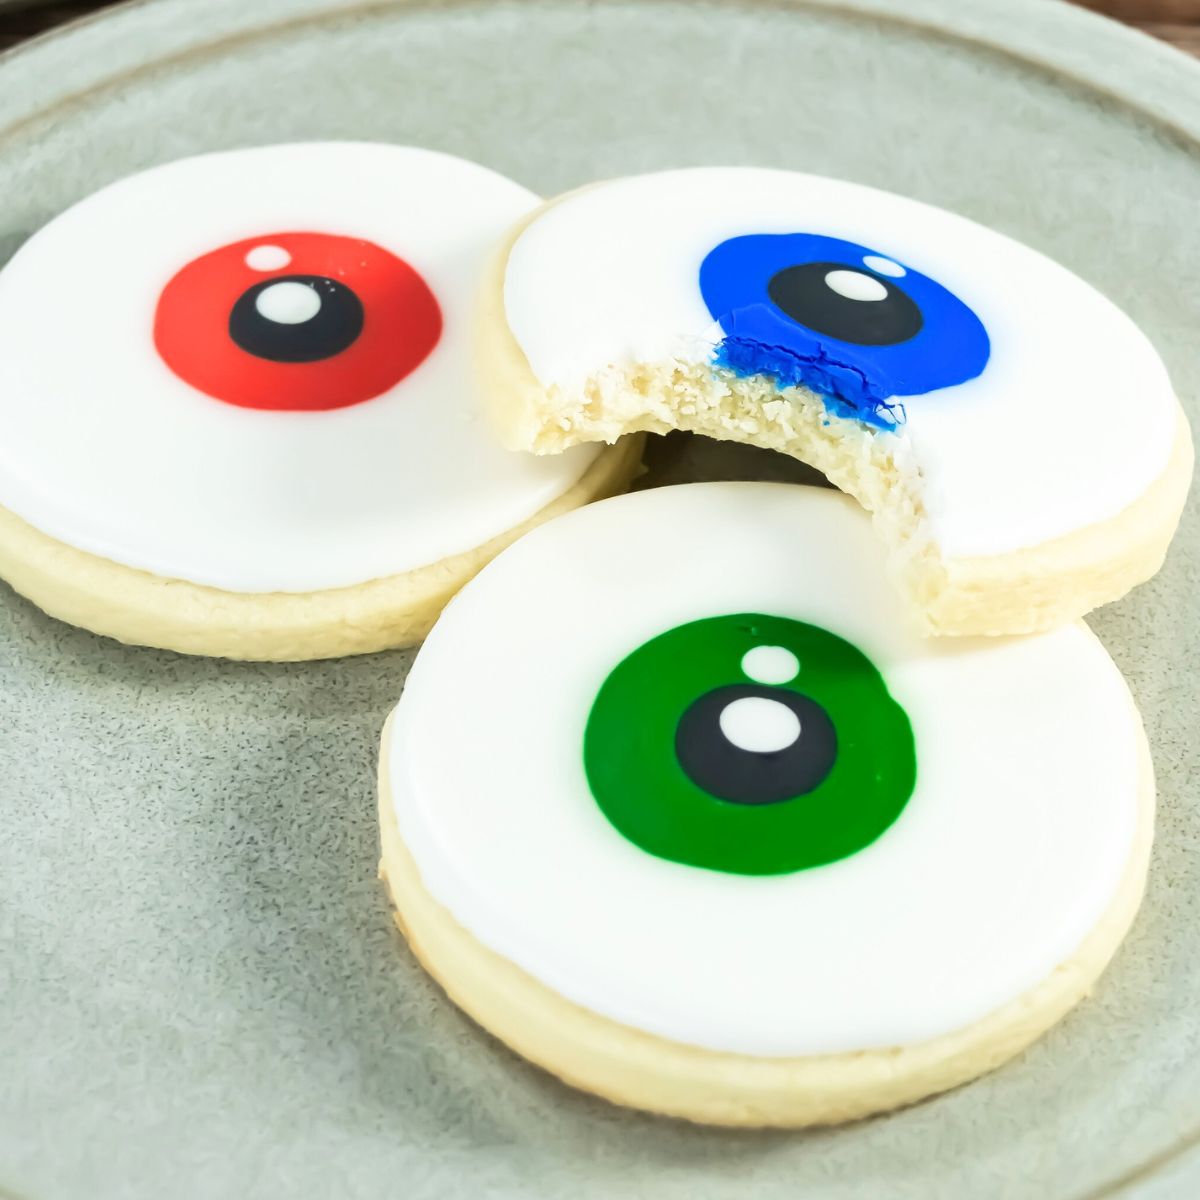
These eyeball decorated sugar cookies are sure to be the talk of all the guests with their detailed eyeballs and creepy looks. Although they look really elaborate, they aren't too difficult to make especially following the easy steps below.
If you like spooky treats, you may also like these eyeball cupcakes or these eyeball rice krispie treats.
This eyeball cookie recipe is a perfect halloween cookie to make as they are super creepy. But, they don't use many ingredients and aren't too hard to decorate.

Ingredients
For the cookies:
- Sugar
- Butter - unsalted + softened
- Egg
- Vanilla
- Flour
For the icing:
- Sugar
- Meringue Powder
- Vanilla
- Water
- Corn Syrup
- Food Coloring - black, green, blue, red
See recipe card for quantities.
Instructions
Follow these easy step by step instructions and process photos to make your own eyeball decorated sugar cookies.
Preparation: Preheat the oven to 350 degrees. Line your baking sheets with parchment and set aside.

Step one: In the bowl of a stand mixer, combine the sugar and butter. Cream until smooth. Add in the vanilla and egg. Mix well.

Step two: Switch the mixer attachment to the paddle and add in the flour. Mix until the dough balls together and pulls away from the sides of the bowl. If your mixer is struggling, you can knead the dough by hand.
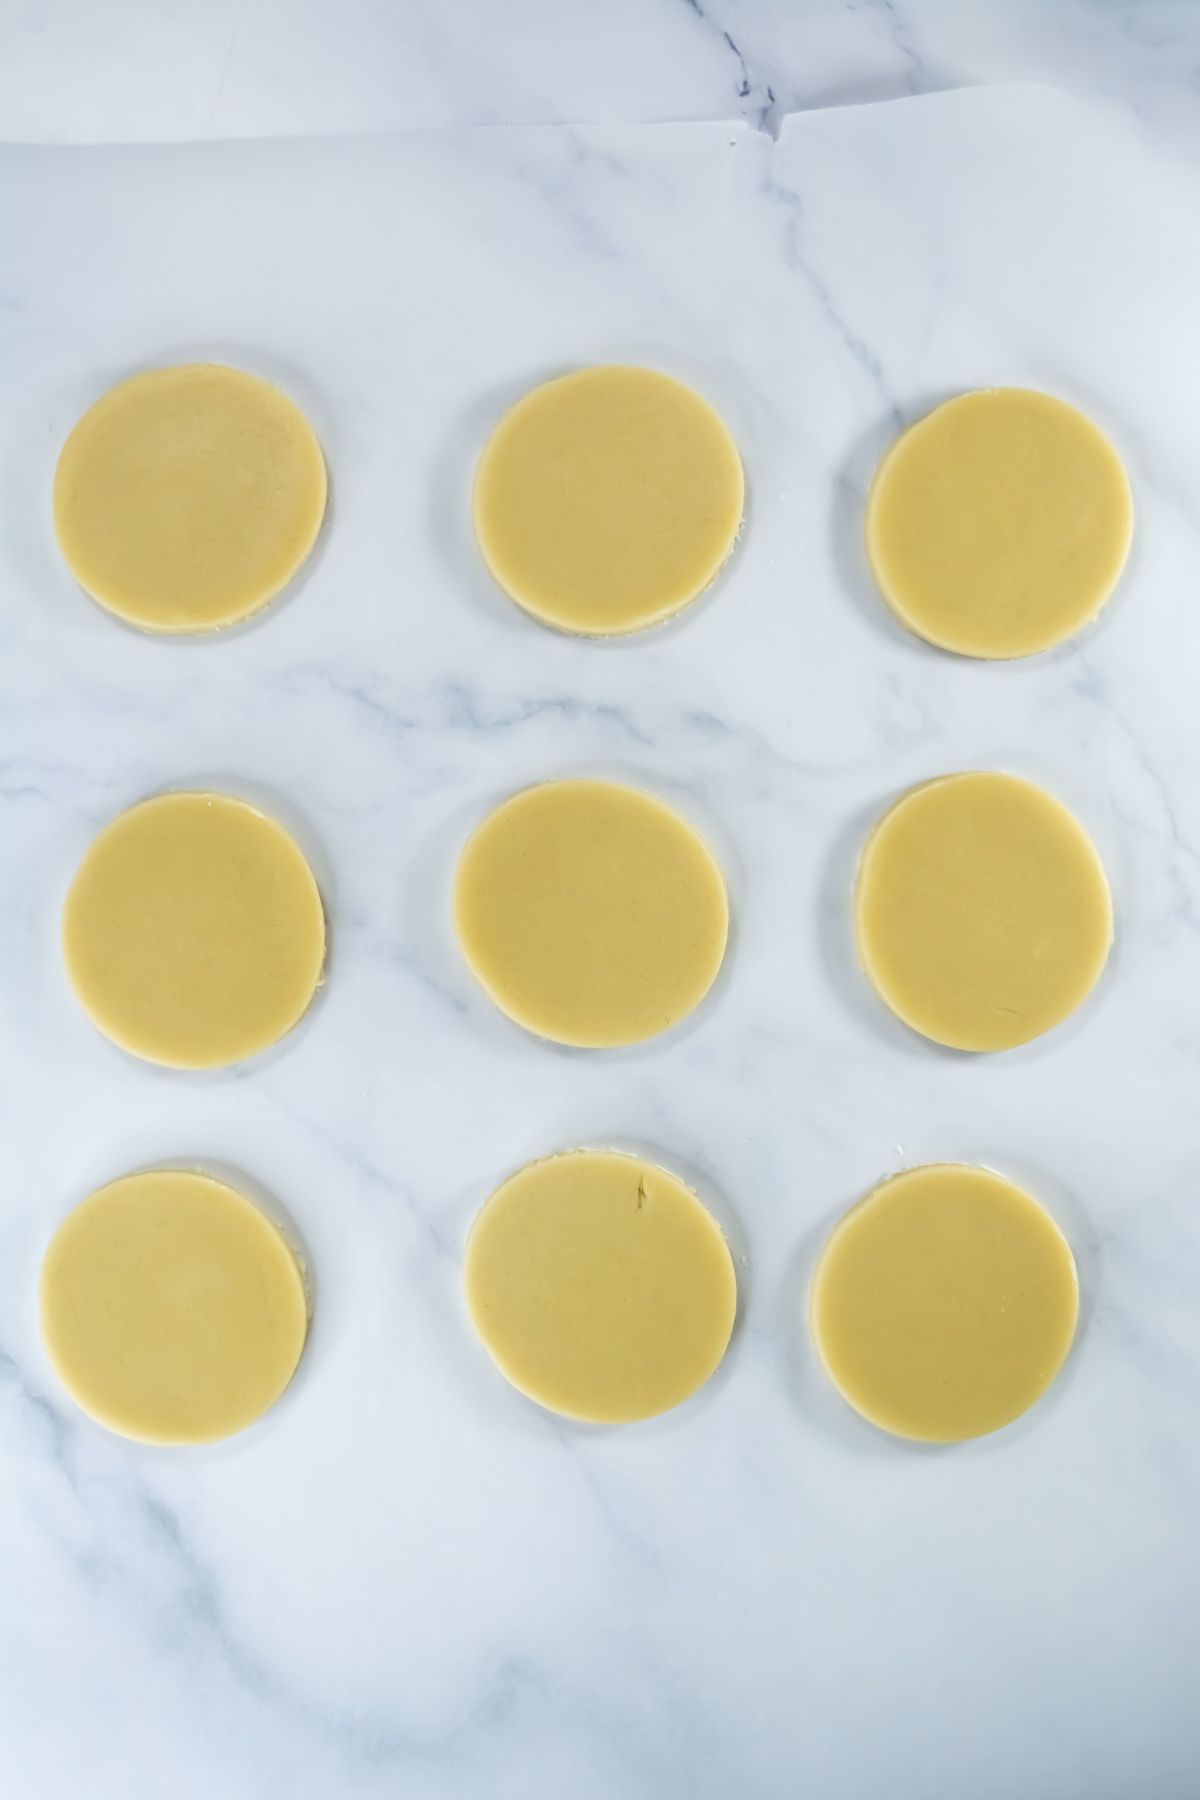
Step three: Using a lightly floured work surface, roll the cookie dough out until it's about ½ - ⅝ of an inch thick. Using a round cookie cutter, cut out cookie dough. Save and reroll the scrapes until the dough is too small to continue. Carefully transfer your cut out dough to the parchment lined baking sheets. Bake in the preheated oven for 10-12 minutes.
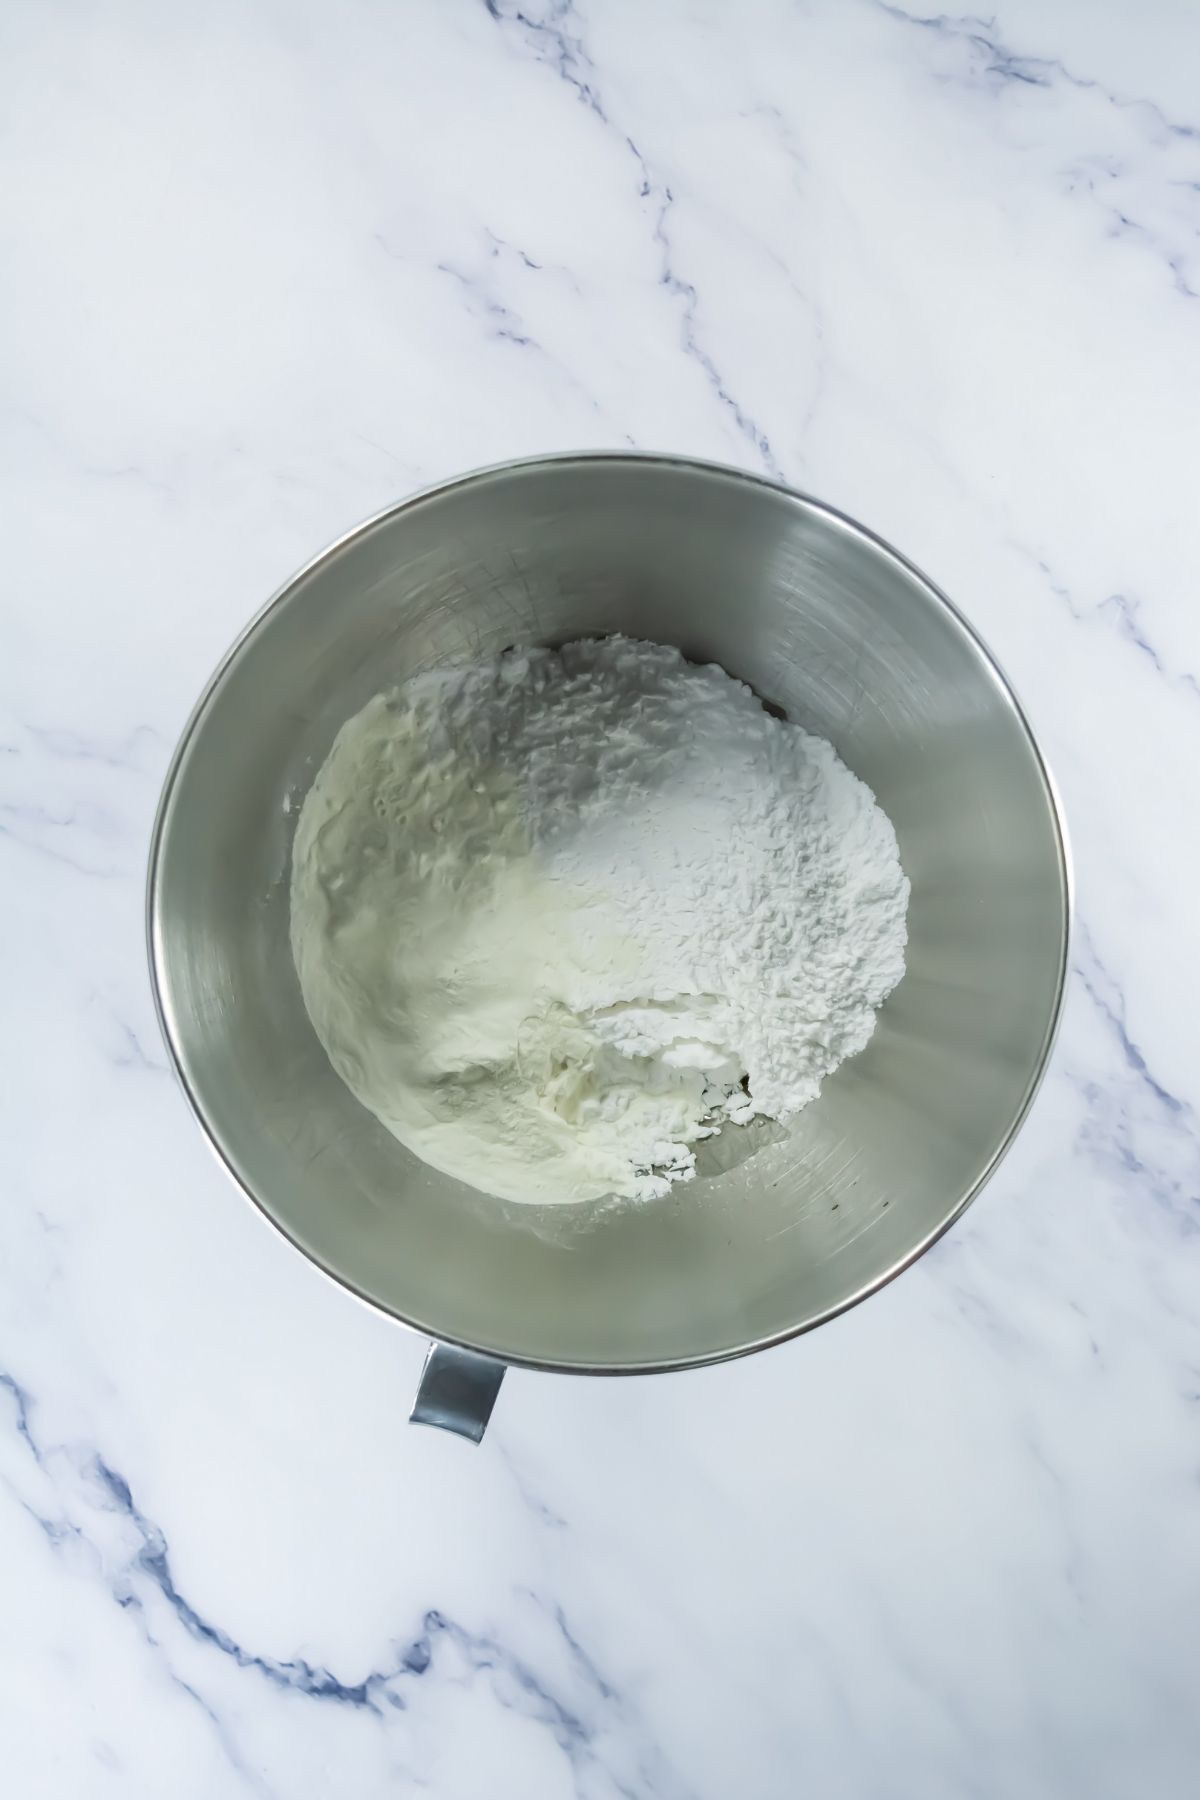
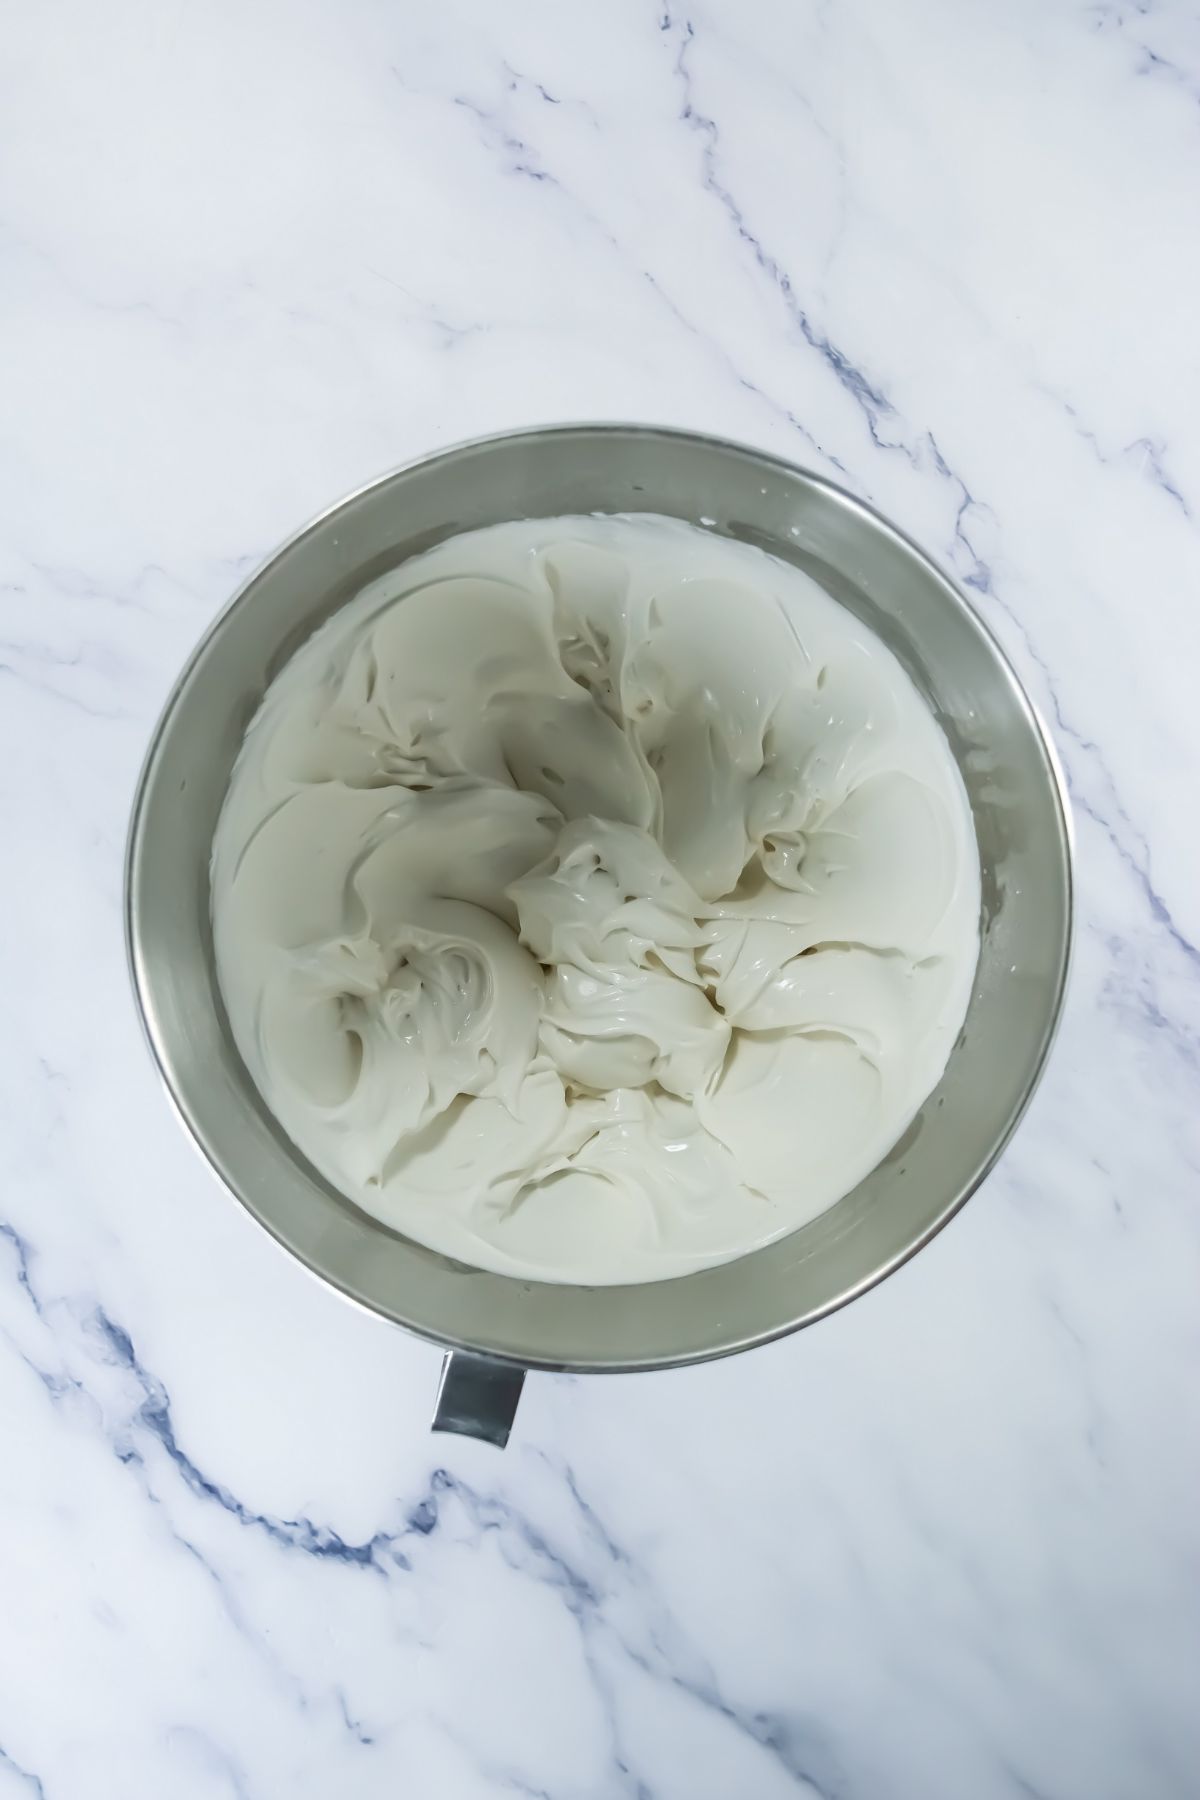
Step four: For the soft-bite icing - In the bowl of the stand mixer, combine the 2 c powdered sugar, meringue powder and 1 t vanilla. Using the paddle attachment, mix on low speed for about 30 seconds. Add in 3 teaspoons worth of water as the mixer is going. Allow to mix until combined. Increase the speed to medium for another 2-3 minutes. The icing will be very stiff. Transfer to another bowl and cover with a damp paper towel.
Step five: Using the same mixing bowl, combine the other 2 cups of powdered sugar, corn syrup, 2 tablespoons of water and the other teaspoon of vanilla. Mix on low speed until combined with the whisk attachment.
Step six: Combine the two icing mixtures into one bowl and whisk until smooth. Add in additional water if needed to thin the mixture. Using a spatula, scoop a bit of icing up and allow it to drop back into the bowl. The icing should re-incorporate back into itself and settle within about a 12-15 second count.

Step seven: Transfer half of the white icing to a piping bag. Transfer the rest of the icing to four separate bowls and tint each with the black, red, blue and green food coloring.

Step eight: Transfer the tinted icing to piping bags. When ready to decorate, snip a tiny bit off the tip of the piping bag. You can always cut the hole bigger if the icing is not flowing as quickly as you'd like.

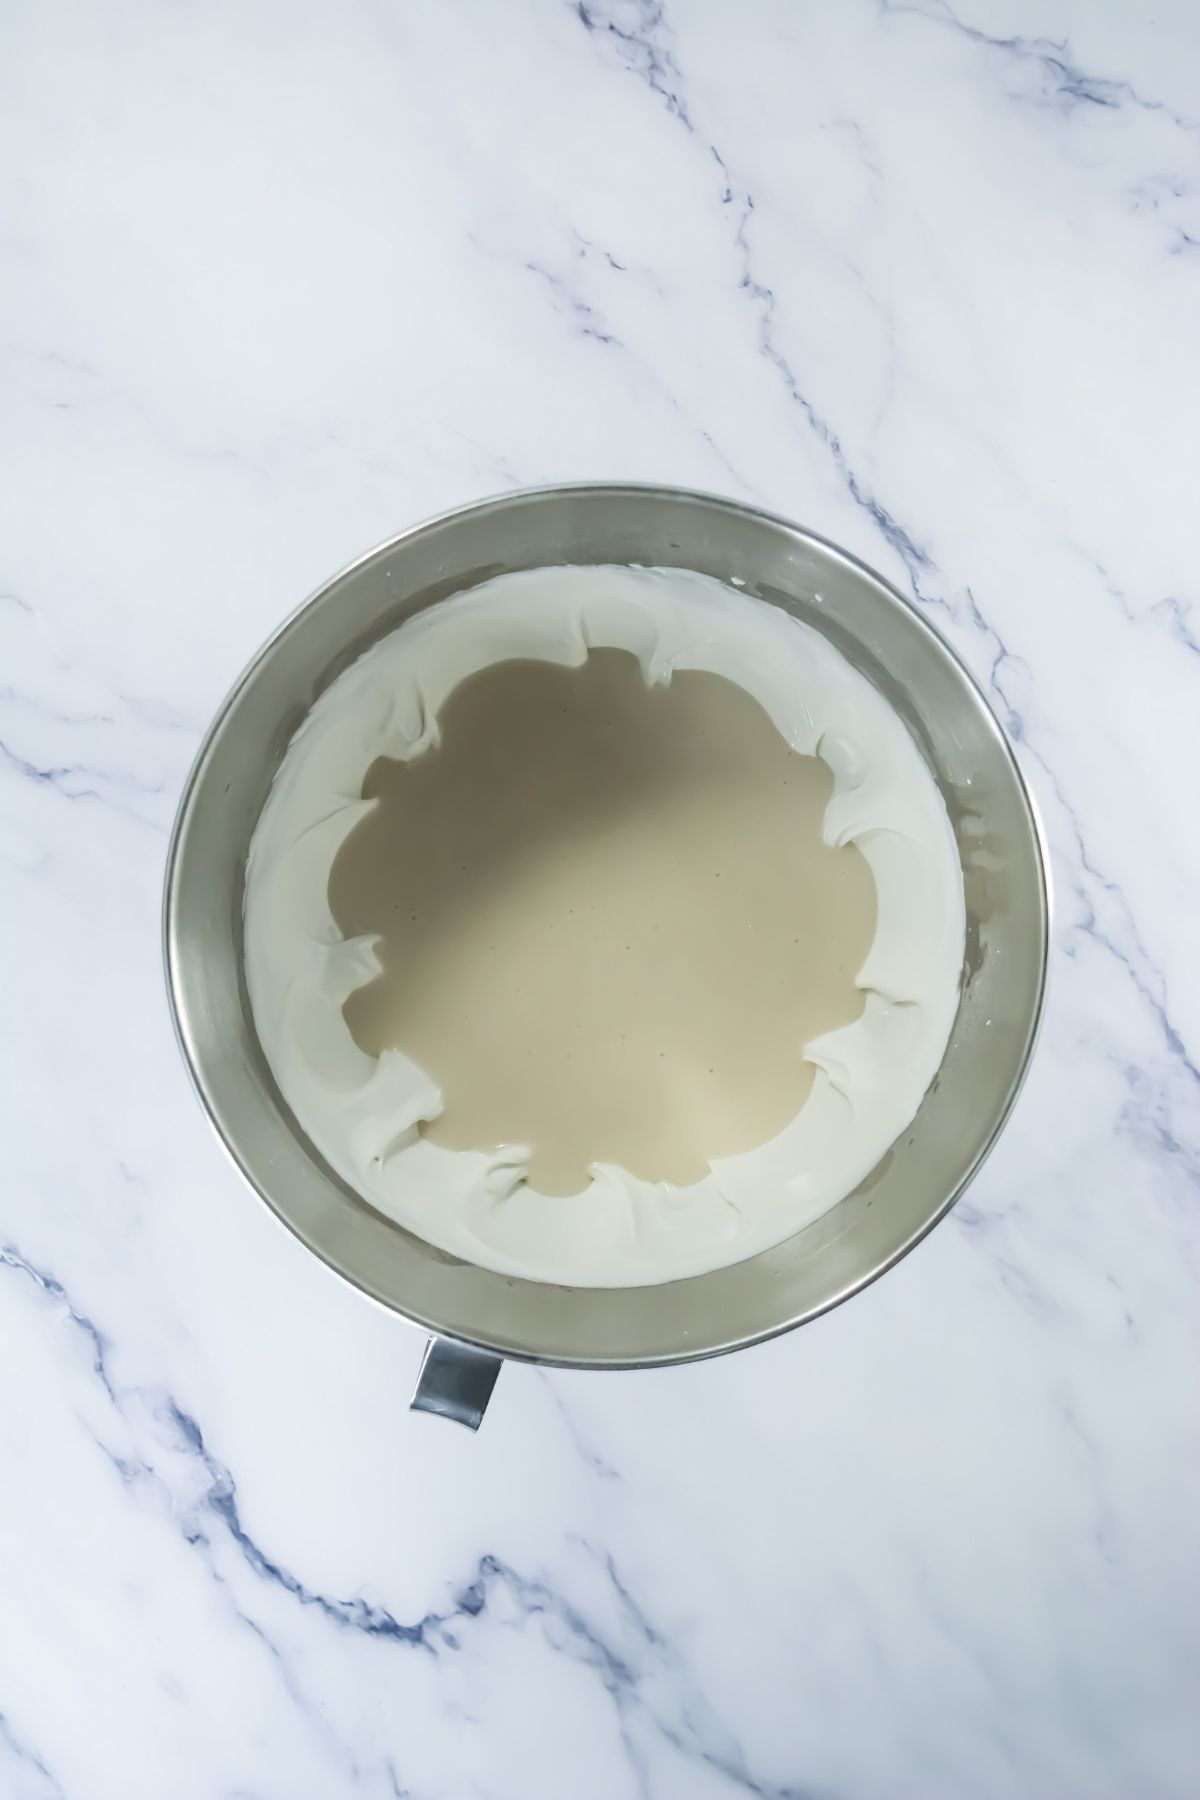
Step nine: Starting with the white icing, pipe a large donut shape, leaving the center empty.

Step ten: Pipe another round of a colored icing for the iris of the eye - blue, red or green.
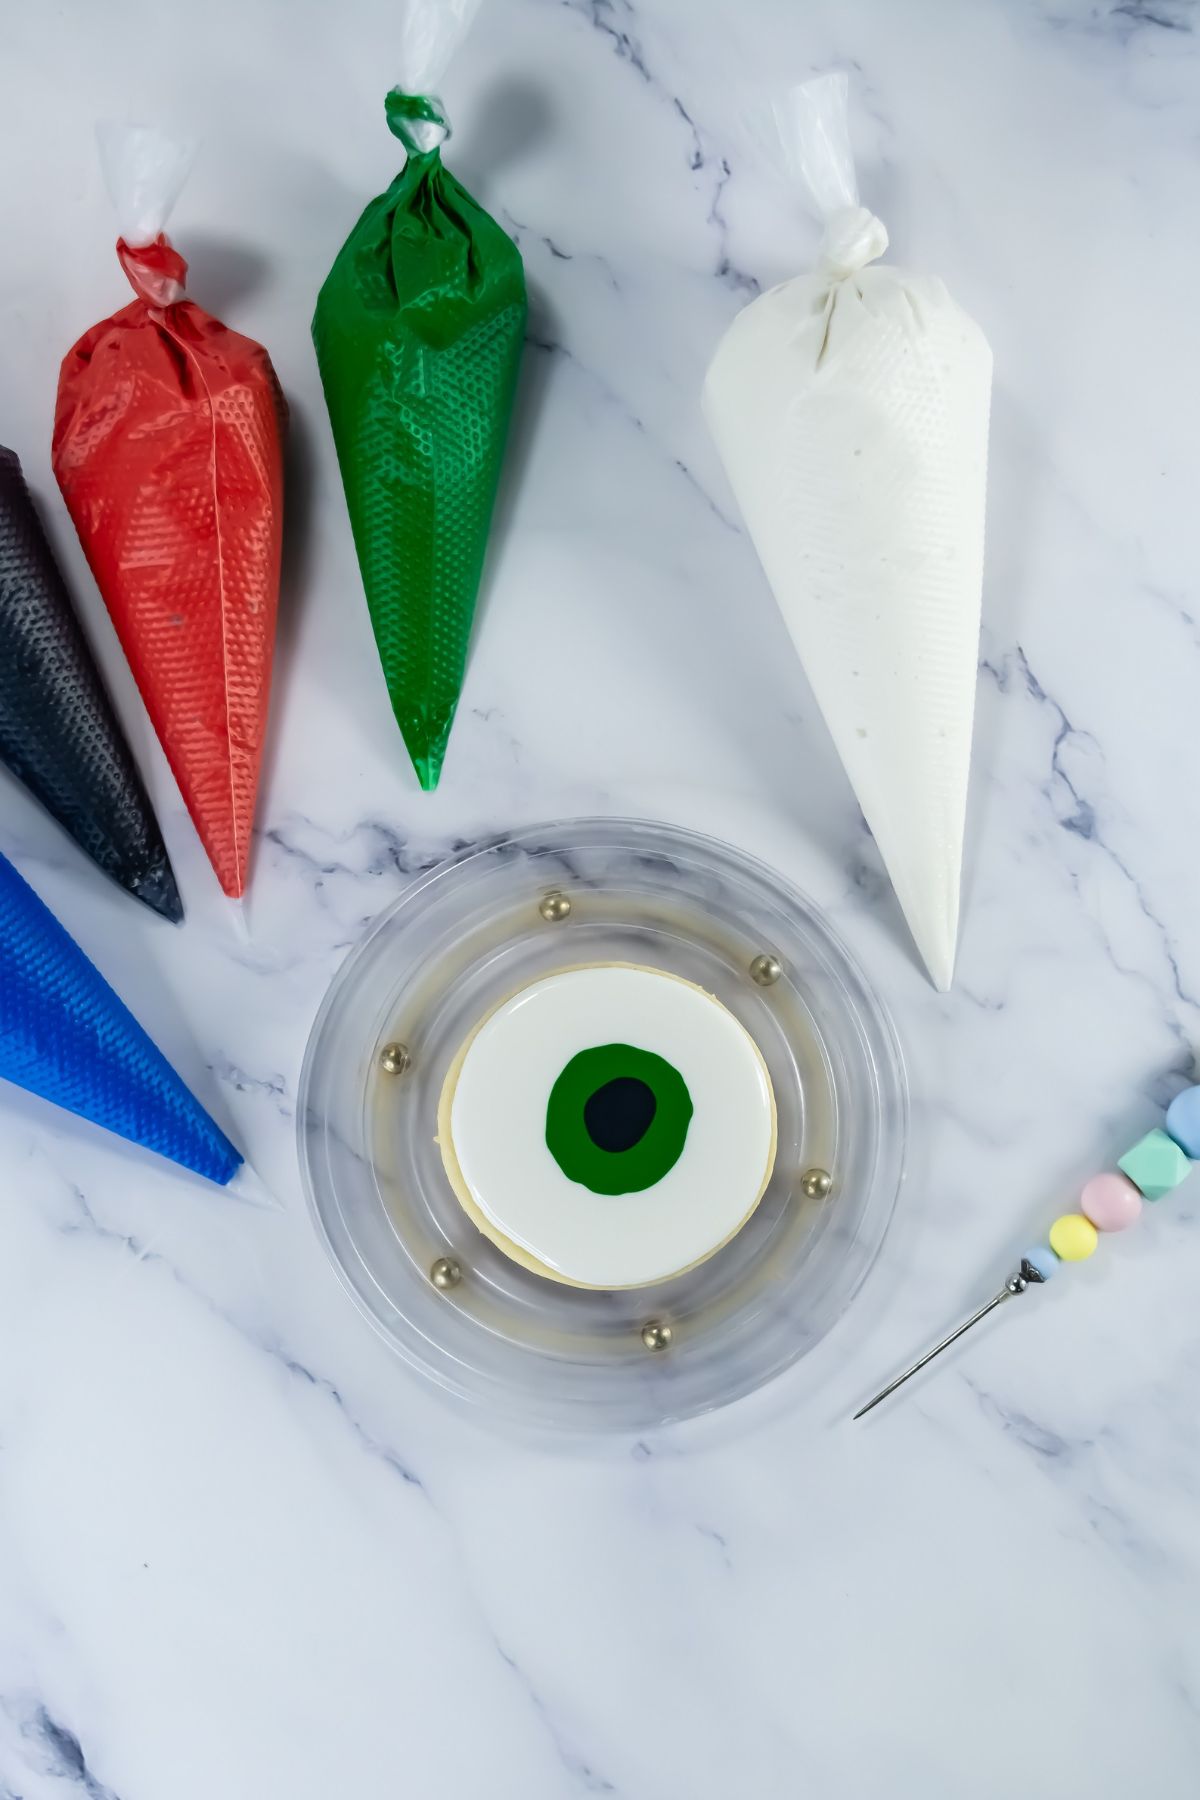
Step eleven: Immediately pipe the black in the center of the eyeball.

Step twelve: Immediately pipe two small white dots for the reflection off the eye in the corner of the pupil and iris.
Hint: Cookies are done when the edges are set and the center is no longer shiny. Make sure not to overcook or the cookies will be hard.
Recipe Tips for Success
- Allow to cool before decorating.
- Cookies will need about 24 hours for the icing to set before they can be stacked. During this time, they can be on a cooling rack or baking sheet at room temp
- Too thin of icing will need a bit more powder sugar and too thick of icing will need another dash of water. Continue to test if needed until desired consistency is achieved. Thin icing spreads nicely but can run over the edges of the cookie.
Storage
Once decorated and set, they need to be stored in an airtight container for up to a week or frozen for 3 months.

Eyeball Sugar Cookies
Equipment
- Piping Bags or ziplock bags
- cookie sheet
- Hand or Stand Mixer
- Mixing Bowls paddle and whisk attachment
- Measuring spoons and cups
- Round Cookie Cutter
Ingredients
For sugar cookies
- 1 cup Sugar
- 1 cup Butter unsalted + softened
- 1 Egg
- 1 teaspoon Vanilla
- 3 cups Flour
For the icing
- 4 cups sugar divided
- 2 tablespoon Meringue powder
- 2 teaspoon Vanilla divided
- ½ - ¾ cup Water
- 2 tablespoon Corn syrup
- Food Coloring black, green, blue and red
Instructions
- Preheat the oven to 350 degrees. Line your baking sheets with parchment and set aside
- In the bowl of a stand mixer, combine the sugar and butter. Cream until smooth.
- Add in the vanilla and egg. Mix well.
- Switch the mixer attachment to the paddle and add in the flour. Mix until the dough balls together and pulls away from the sides of the bowl. If your mixer is struggling, you can knead the dough by hand.
- Using a lightly floured work surface, roll the cookie dough out until it's about ½ - ⅝ of an inch thick.
- Using a round cookie cutter, cut out cookie dough. Save and reroll the scrapes until the dough is too small to continue.
- Carefully transfer your cut out dough to the parchment lined baking sheets. Bake in the preheated oven for 10-12 minutes. Watch closely - over baking will cause hard cookies. Cookies are done when the edges are set and the center is no longer shiny.
- Allow to cool before decorating.
For the soft bite icing
- In the bowl of the stand mixer, combine the 2 c powdered sugar, meringue powder and 1 t vanilla. Using the paddle attachment, mix on low speed for about 30 seconds.
- Add in 3 teaspoons worth of water as the mixer is going. Allow to mix until combined.
- Increase the speed to medium for another 2-3 minutes. The icing will be very stiff. Transfer to another bowl and cover with a damp paper towel.
- Using the same mixing bowl, combine the other 2 cups of powdered sugar, corn syrup, 2 tablespoons of water and the other teaspoon of vanilla. Mix on low speed until combined with the whisk attachment.
- Combine the two icing mixtures into one bowl and whisk until smooth. Add in additional water if needed to thin the mixture. Using a spatula, scoop a bit of icing up and allow it to drop back into the bowl. The icing should re-incorporate back into itself and settle within about a 12-15 second count.
- Transfer half of the white icing to a piping bag.
- Transfer the rest of the icing to four separate bowls and tint each with the black, red, blue and green food coloring.
- Transfer the tinted icing to piping bags.
To decorate cookies
- When ready to decorate, snip a tiny bit off the tip of the piping bag. You can always cut the hole bigger if the icing is not flowing as quickly as you'd like.
- Starting with the white icing, pipe a large donut shape, leaving the center empty.
- Pipe another round of a colored icing for the iris of the eye - blue, red or green.
- Immediately pipe the black in the center of the eyeball.
- Immediately pipe two small white dots for the reflection off the eye in the corner of the pupil and iris.
- Repeat with the remaining cookies.
Notes
- For the icing: Too thin of icing will need a bit more powder sugar and too thick of icing will need another dash of water. Continue to test if needed until desired consistency is achieved. Thin icing spreads nicely but can run over the edges of the cookie.
- Don't overcook or cookies will become hard.
- Cookies will need about 24 hours for the icing to set before they can be stacked. During this time, they can be on a cooling rack or baking sheet at room temp.
- Once decorated and set, they need to be stored in an airtight container for up to a week or frozen for 3 months.
Nutrition information provided is just an estimate and may vary based on specific ingredients used.