These fun Mickey mouse Rice Krispie treats are the perfect addition for birthday parties or other gatherings and celebrations. These are super easy to throw together and you only need a few ingredients.
What are Mickey Mouse Rice Krispie Treats?
Mickey mouse Rice Krispie treats are a combination of cocoa crispy cereal, butter, marshmallows and then shaping your treats into mouse shaped heads. You can get these made up very easily, no baking is required. These can be ready in 15 to 20 minutes.
These treats are as simple as making cocoa Rice Krispie treats and then using some round shaped cookie cutters. Cookie cutter Rice Krispie treats can look fancy, but are super easy to make, just like Minnie Mouse Rice Krispie treats.
Variations
For these treats we used cocoa krispies. And did minimal decoration just to keep them clean and crisp looking. However, if you want something a little more elaborate here are a few ideas:
- Use cocoa pebbles: using Cocoa pebbles works the same as using Cocoa Krispies they're almost the same color and a similar flavor as well.
- Dip them in chocolate: use regular Rice Krispies cereal and then make the chocolate rice krispie treats to resemble the black color of Mickey mouse.
- Use red candy melts: add a splash of color by dipping the bottom of your Mickey mouse in red candy melts to resemble his red trousers.
- Use red food coloring: make some Mickey mouse shaped treats in brown with the Cocoa Krispies and some Mickey mouse shaped treats in red with food coloring.
- Use black food coloring: instead of having chocolate flavored Mickey mouse treats make original Rice Krispie treats but add black food coloring to color them.
How to Make these treats
These three ingredient treats are super easy to make. You can whip them up in no time.
Supplies
- spatula
- large stock pot or Microwave Safe Bowl
- Measuring Cup
- 9 x 13 baking pan
- Cookie Cutters - two circles one larger than the other.
Ingredients
- 6 Cups Cocoa Krispies Cereal
- 16 oz of Jet Puff Marshmallows
- 4 Tbs Salted Butter
- (optional) non-stick canola oil spray
Instructions
Step One
Gather up your spatula, bowl, pan, cocoa krispies, butter and marshmallows. Before you start, you'll also want to grease anything that will be touching your marshmallows.
Marshmallows with melted get extremely sticky and difficult to work with, but having everything greased makes it a lot easier to work with them.
We like to use non-stick cooking spray just because it is quicker, easier, and provides a slightly more consistent coding. However, butter has a slightly better flavor.
Step Two
First up will be melting together your butter and marshmallows. You have two ways you can do this: use your microwave or use your stove.
if you choose to microwave them the process will go much quicker at just a few minutes. If you choose to use your stove it will take longer, upwards of 10 minutes. However, if you use your stove you'll have much more control over the amount of heat you apply to your marshmallows.
In your microwave:
- Measure four tablespoons of butter and 16 oz of marshmallows and add both to a microwave safe bowl.
- Open your microwave and place your bowl with butter and marshmallows and side.
- Heat for 30 to 60 seconds.
- When you take your bowl out your marshmallows will be significantly puffed up. Stir them well and they will go back down.
- Place the bowl back in your microwave and heat at 30 second intervals stirring in between each interval until your marshmallows are melted.
On your stove:
- Measure out four tablespoons of butter and add that to your pot.
- Turn your burner on low heat and place your pot on the burner.
- Stir your butter occasionally until it is melted.
- Measure out 16 oz of marshmallows and toss them in the pot with melted butter.
- Continue to heat your mixture on low, stirring your marshmallows frequently until they have melted.
- Remove from the heat and stir well until everything is combined.
Step Three
Now it's time to add your cereal. Measure out 6 cups of Cocoa Krispies cereal.
Slowly add your Cocoa Krispies to your marshmallow and butter mixture. Try to fold the cereal in to the marshmallows versus stirring it so that you don't crush your cereal.
Step Four
After you have a consistent marshmallow and cereal mixture, take out your pre-greased pan and spatula.
Use your greased spatula to spread the marshmallow and cereal mixture into your pan at an even thickness.
Step Five
You must wait for your treats to cool before using your cookie cutters. Set the pan aside and let them cool for around 30 minutes. If you would like to speed up the process, you can pop them in the freezer or the fridge for a few minutes.
Step Six
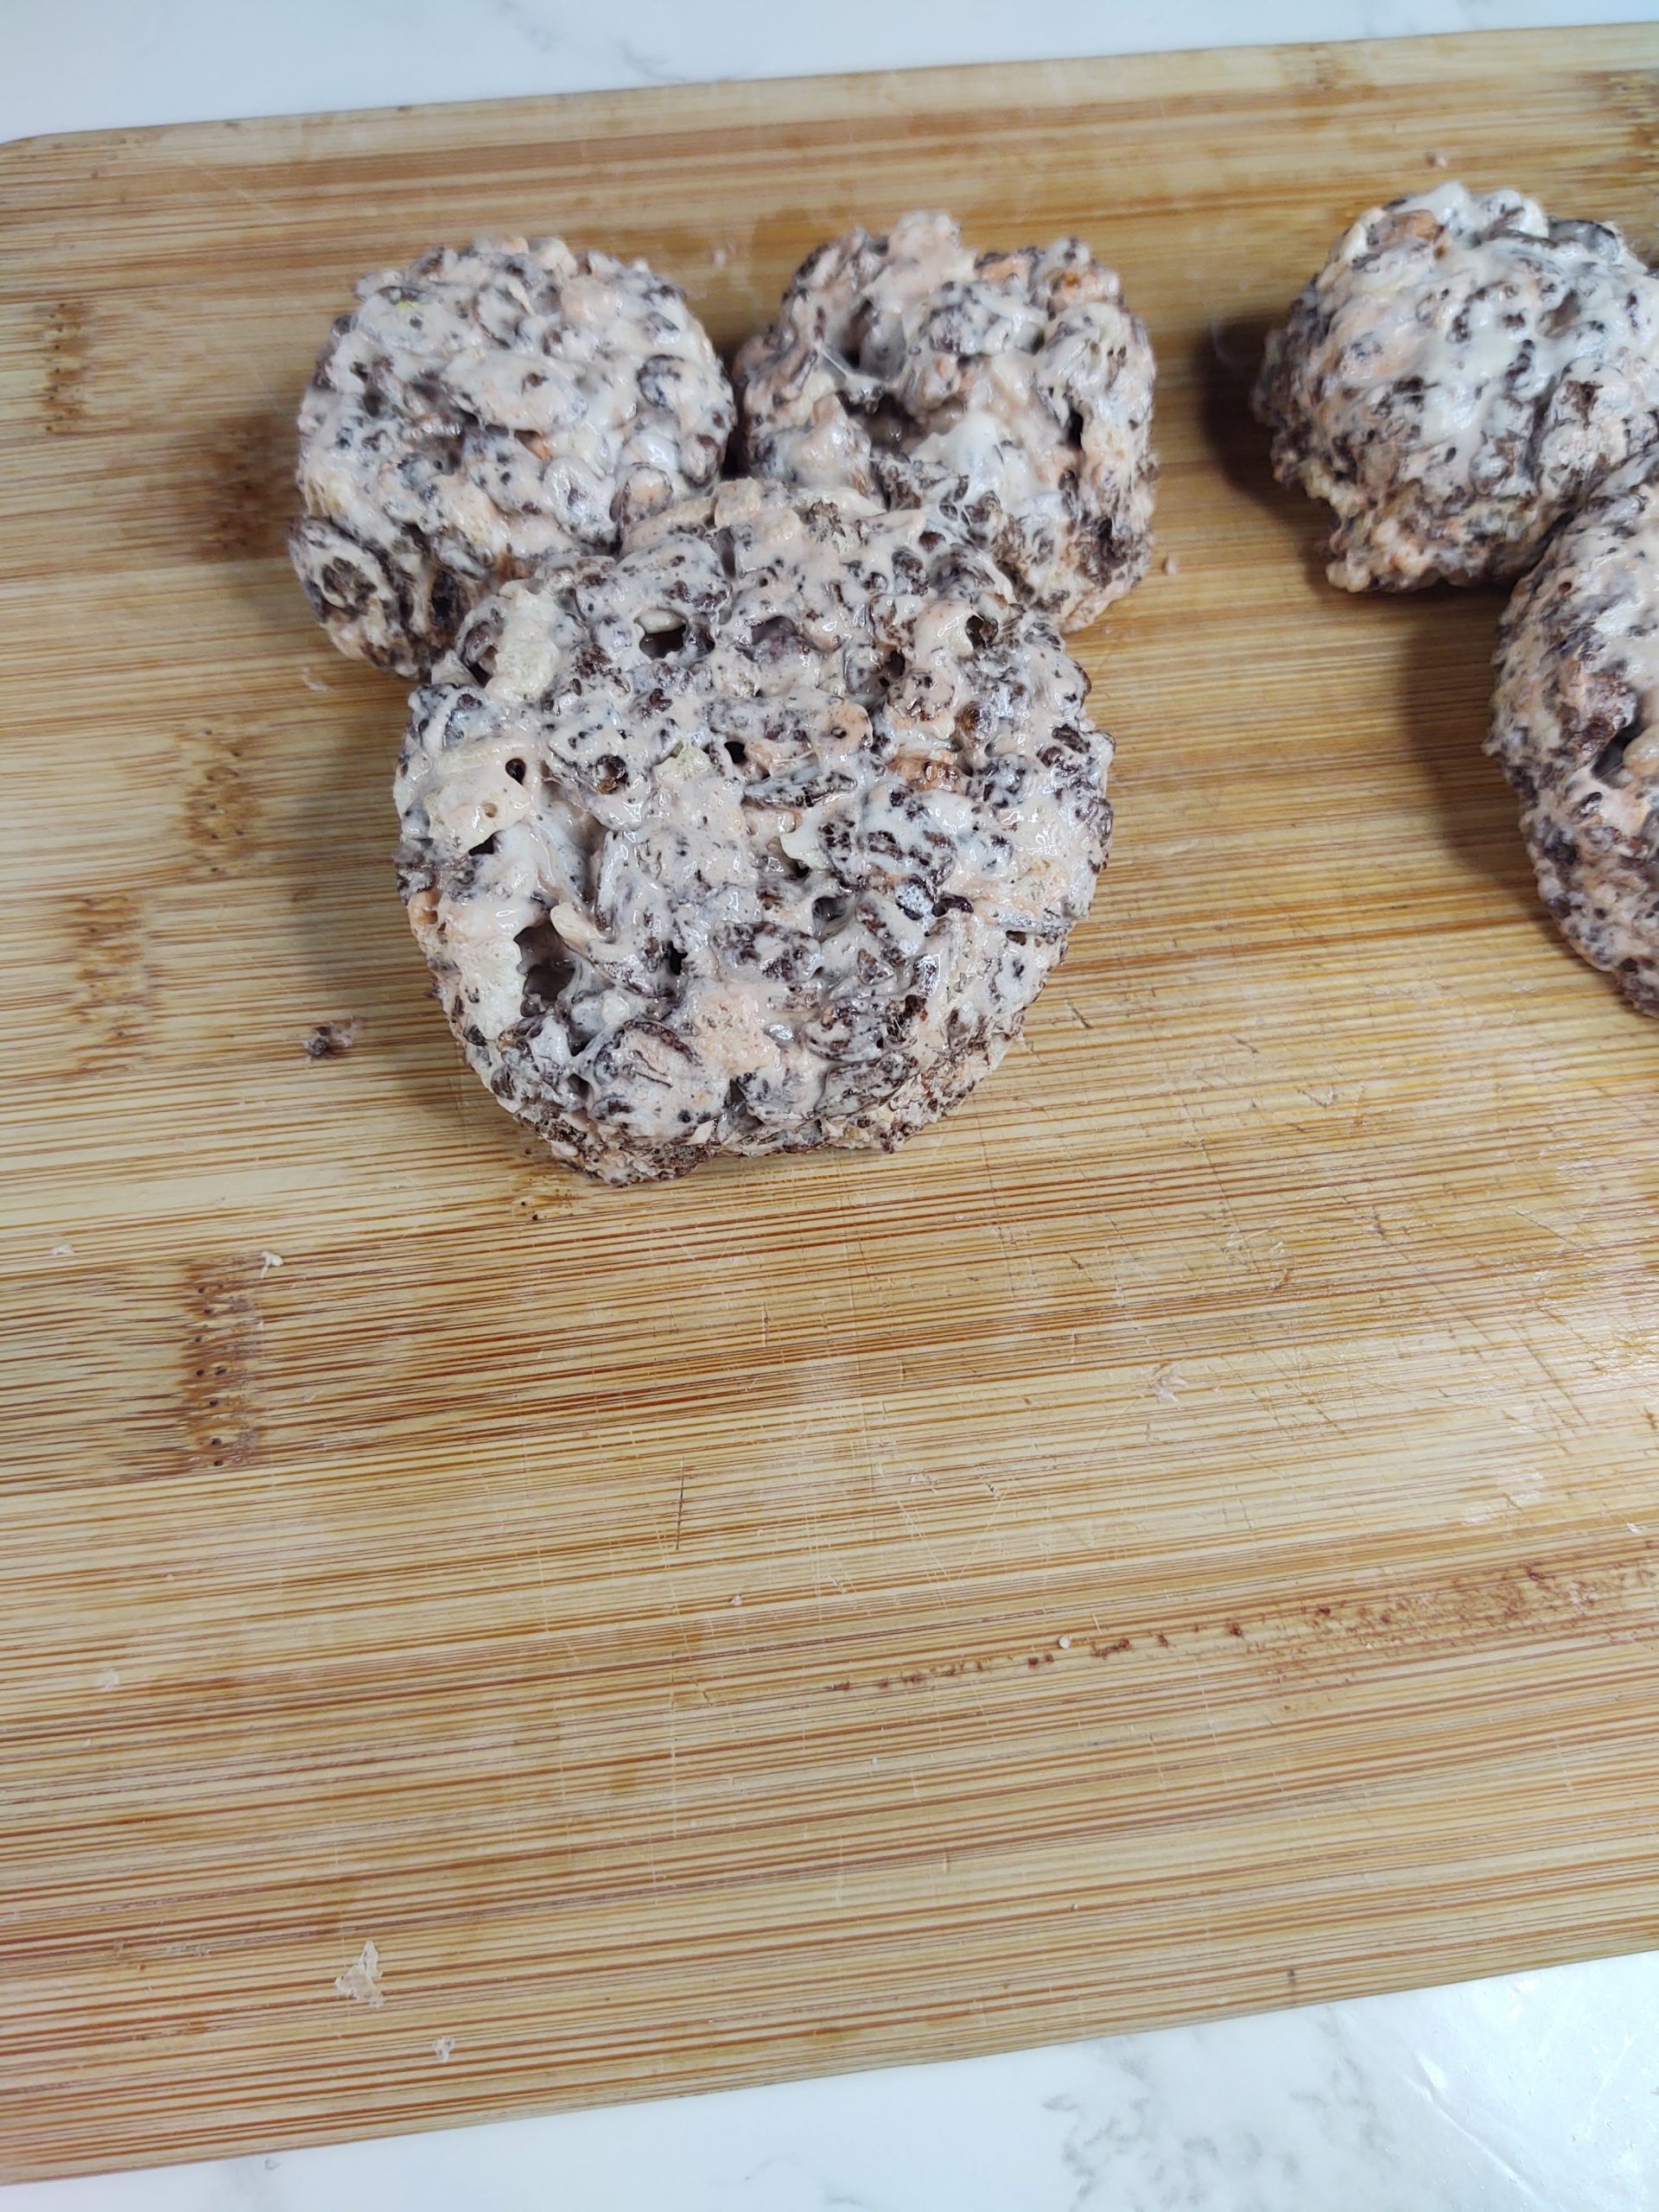
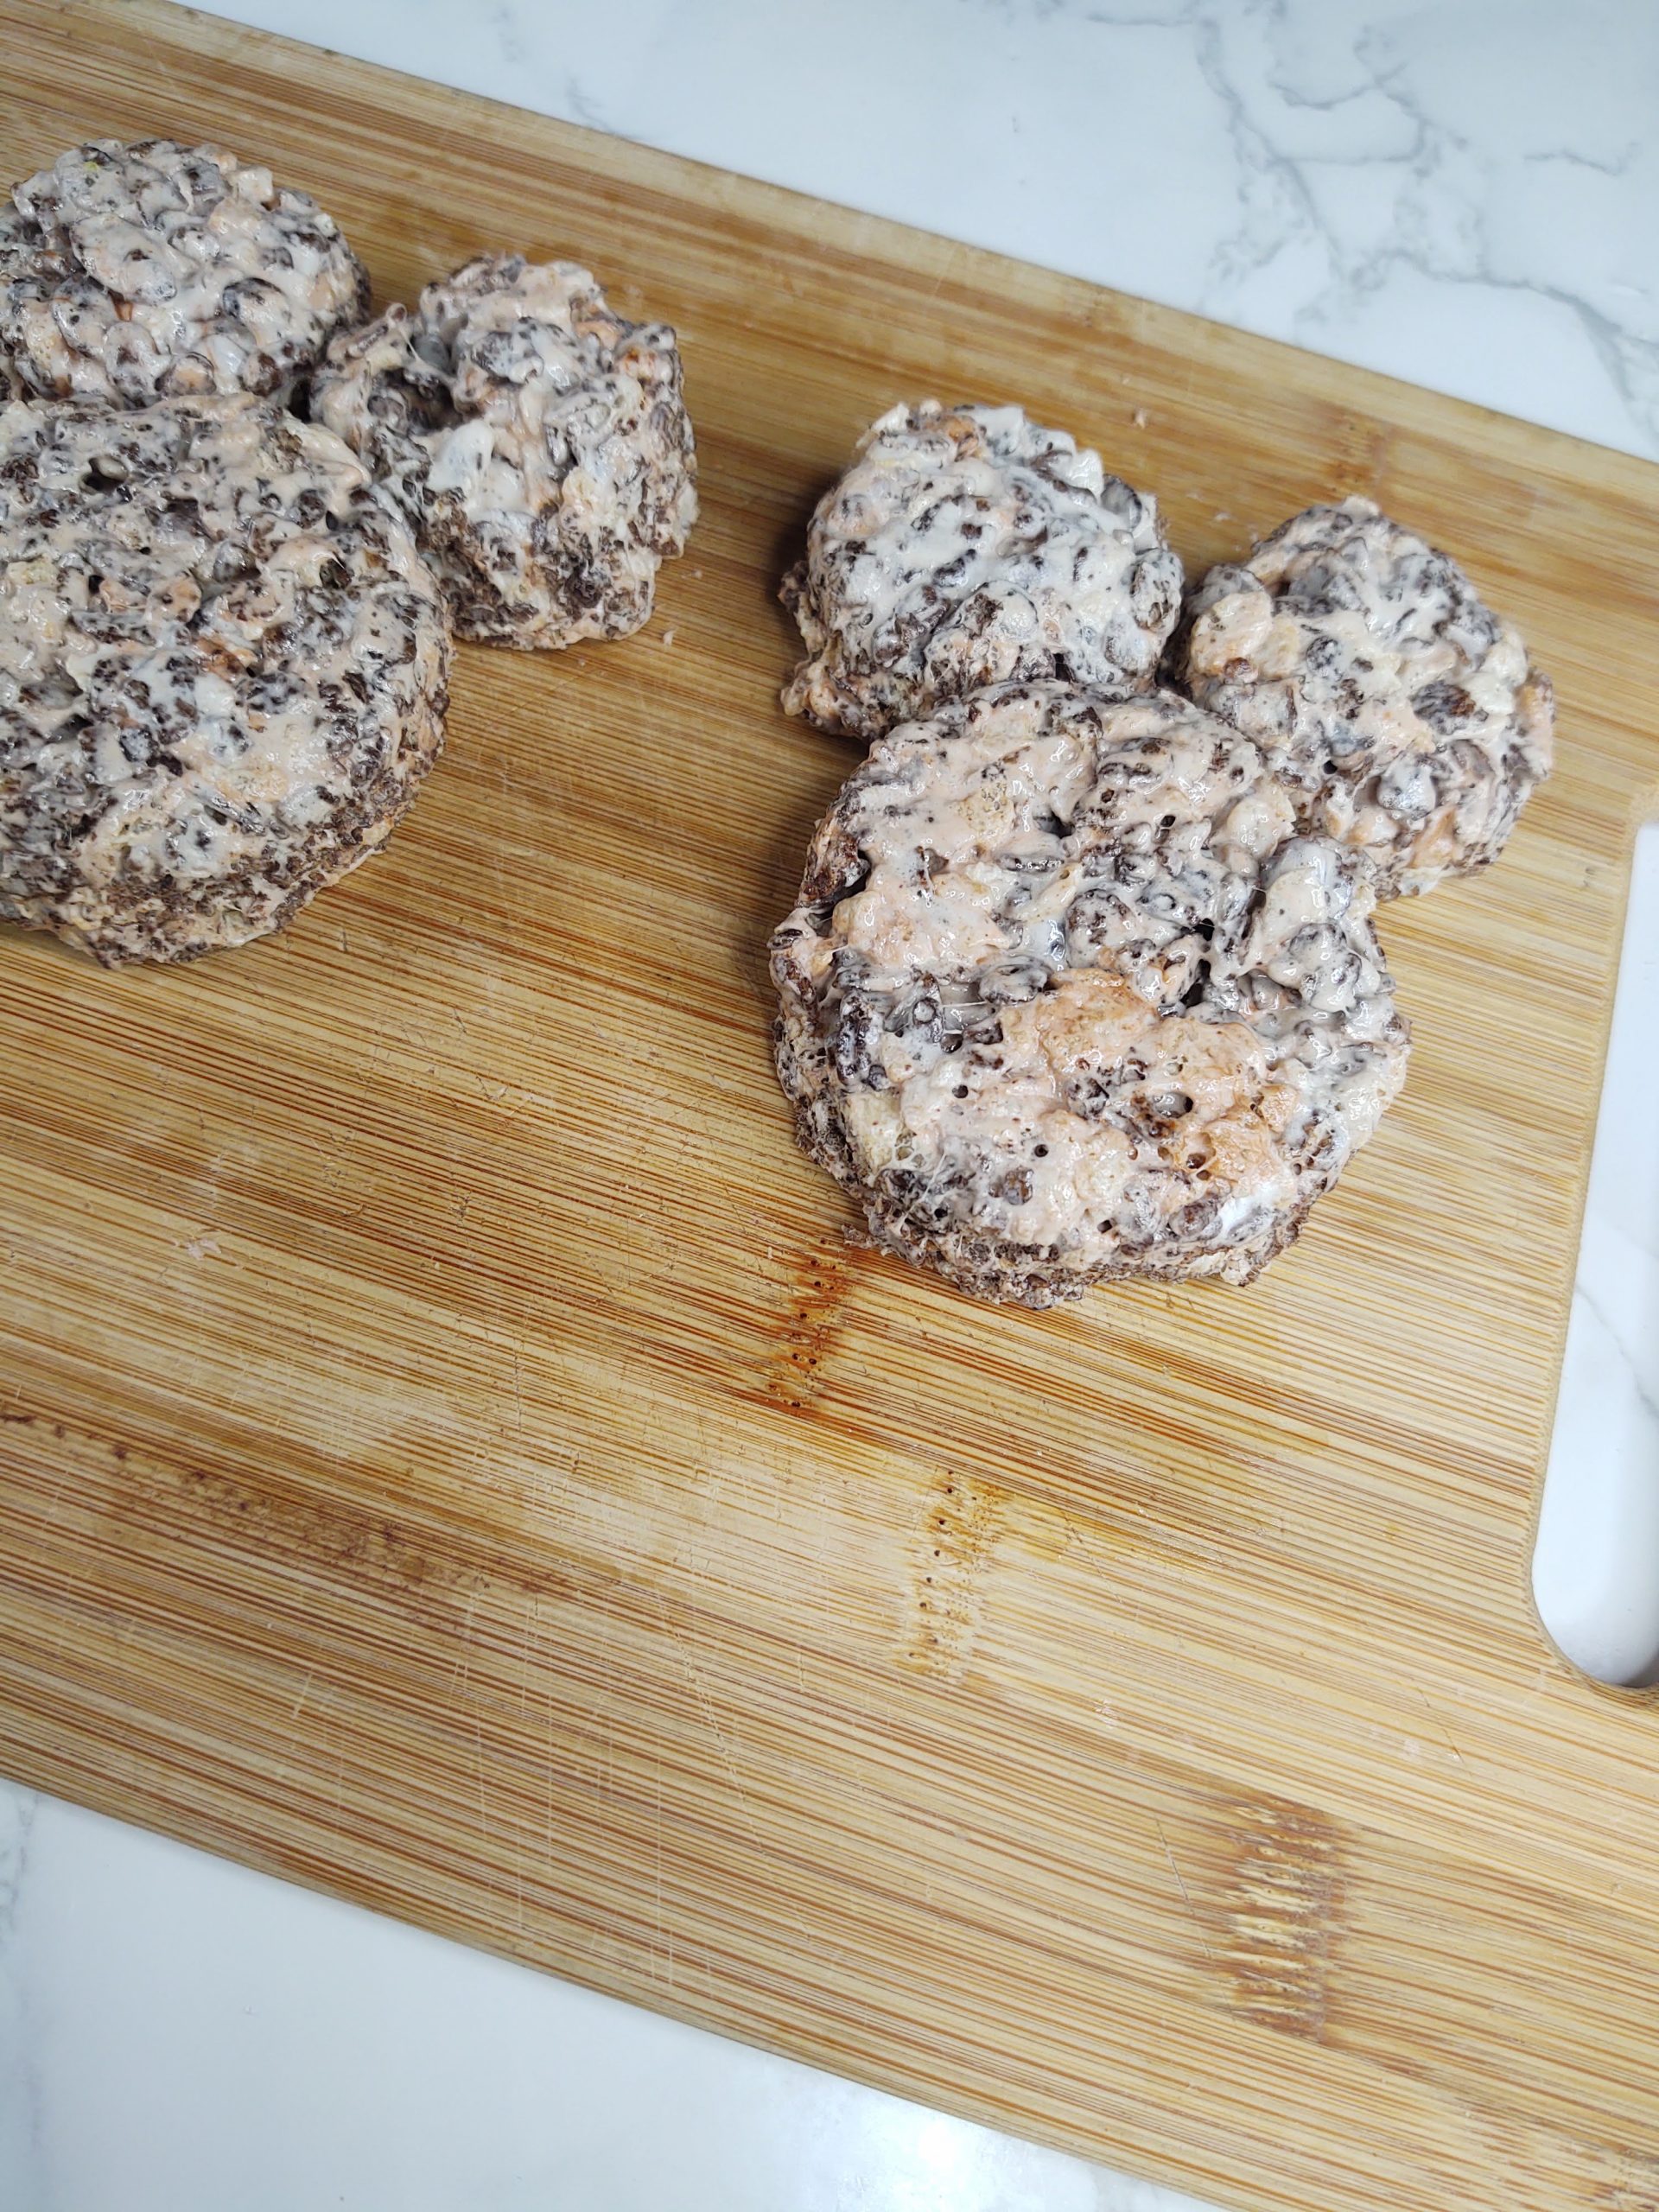
Now that your treats are cool, take your large round cookie cutter and cut a few circles from your treats.
Step Seven
Next, take your smaller round cookie cutter and cut two smaller circles for each large circle you cut.
Gently press the two smaller circles onto the top of the larger circles to make ears.
Once you have assembled all of your circles you can sit back and enjoy your Mickey mouse Rice Krispie treats.
Pro Tips
- Grease your cookie cutter: even though your treats will be cooled when you use your cookie cutters and therefore less sticky, it can still help to get a cleaner cut if you grease your cookie cutters before using them.
- Use a knife: depending on how deep your cookie cutters are, sometimes it can be difficult to get them all the way through your treats. You can use a greased knife to carefully trim around the outside of the cookie cutter and help you to pull out cleaner crisper circles.
- Use a dab of chocolate frosting: you are a small circle ears should press on to the larger circle easily. However, if you have cooled your treats too much sometimes they don't stick as well. You can use a little dab of chocolate icing or even a little dab of sticky melted marshmallow to hold them together.
- No overheating: if you overheat your marshmallows it will make your treats hard which will make it even harder to stick your ears onto your circle head. Make sure you only apply heat long enough to melt your marshmallows and no longer.

Mickey Mouse Rice Krispie Treats
Equipment
- Spatula
- 9x13 Pan
- large stock pot
- Large mixing bowl
- measuring cups
- Large and small circle cookie cutters
Ingredients
- 16 oz Marshmallows
- 4 tbs Salted Butter
- 6 cups Cocoa Krispies
Instructions
- Get together your supplies and ingredients.
- Make sure to thoroughly pre-grease your cookie cutters, spatula and pan.
- Add 4 tbs of butter to a microwave safe bowl.
- Add 16 oz of marshmallows to the same bowl with your butter.
- Place bowl with butter and marshmallows into the microwave for 30 - 60 seconds.
- After heating, stir everything together well.
- Place bowl with butter and marshmallows back into the microwave for 30 seconds
- After heating, stir well again.
- Continue heating and stirring until marshmallows and butter are totally melted and combined.
- Note: If you want to melt the marshmallows and butter on the stove, follow the instructions in the post above.
- Take 6 cups of cocoa krispies and slowly stir them into your marshmallow and butter mix.
- Once the cereal is well combined with the marshmallows, move the treat mixture into your pan.
- Lightly push the treat mixture down into the pan so that it is even throughout.
- Allow treats to cool for around 30 minutes.
- Take your large circle cookie cutter and cut a few circles of treats.
- Take your smaller circle cookie cutter and cut two treats per each larger circle.
- Gently press two smaller circles on top of each larger circle to make mickeys ears.
Nutrition information provided is just an estimate and may vary based on specific ingredients used.