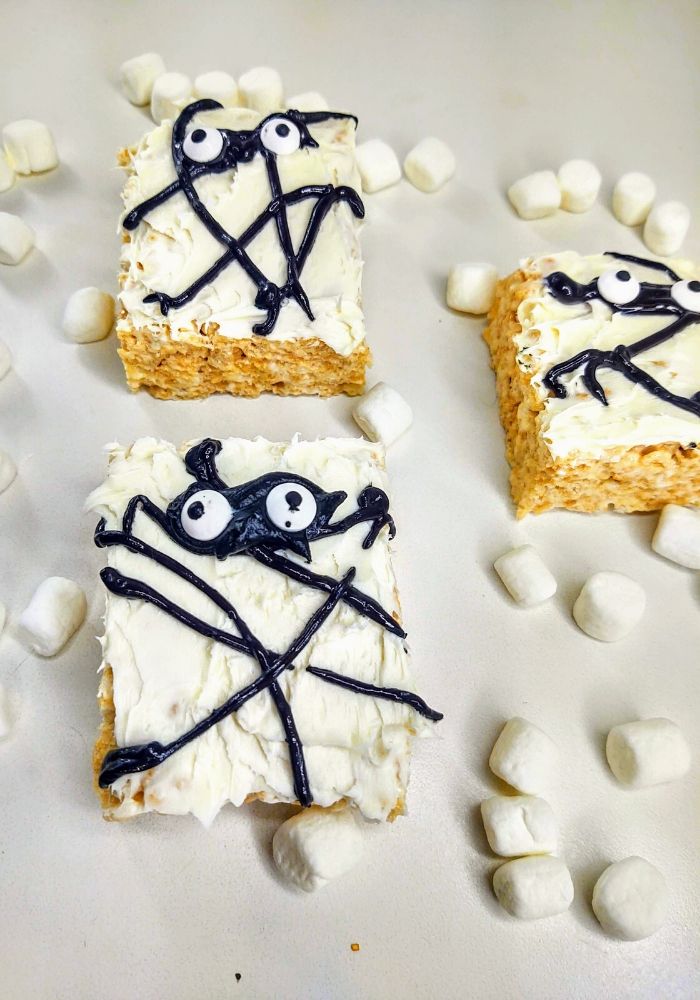
You couldn't ask for a more terrifying treat this Halloween than Mummy Rice Krispie Treats. Put these out at your next Halloween party and you'll be wrapped up in praise for these snacks for the rest of the night.
How to Make Mummy Rice Krispie Treats
These Mummy Rice Krispie Treats are a blast to make and super easy. You don't have to fool around with food coloring like in red, yellow, blue, or green Rice Krispie Treats. You just make a plain original batch of Rice Krispie Treats.
Then we just decorate with some cake icing, black decorating gel, and decorative candy eyeballs. Like I said, it's really easy. And these are sure to be perfect for a kids food craft or as a centerpiece dessert at your next party.
Love mummy themed treats? Try out these cute and yummy mummy brownies.
Variations
One of the most fun things about decorated rice krispie treats is that you can be creative and put your own spin on them. We give detailed instructions below for how to make them the way we have pictured, but here are a few other ideas you can also try:
- Skip the icing: you can skip the all over layer of icing and just use white decorating gel to put the strips of mummy cloth over plain treats.
- Use Candy Melts: instead of using icing and gel, you can use candy melts, melt them down and pipe them onto your treats.
- Skip the black gel: We used the black gel just as a little more color/texture, but you could use white gel on the icing instead.
- Dip them in white chocolate: instead of using icing, give them a chocolate flavor by melting down white chocolate.
- Put them on a stick: Create super cute treats by putting them on a stick and you can even add clear plastic bags with halloween colored ribbon to tie it off if you want to fancy these up.
- Use store bought: if you're short on time and just want to decorate, you can buy store bought treats and just do the decorating part.
Supplies
- spatula
- large stock pot or Microwave Safe Bowl
- Measuring Cup
- 9 x 13 baking pan
Ingredients
- 6 Cups Rice Krispies Cereal
- 16 oz of Jet Puff Marshmallows
- 4 Tbs Salted Butter
- (optional) non-stick canola oil spray
- decorative candy eyeballs
- Cake Icing
- Decorative Icing
Instructions
Once you decide how you want to decorate these, grab your supplies and ingredients so they're in one place and ready to go.
Before you start mixing anything together, make sure that you have thoroughly pre-greased anything that the marshmallows will be touching.
Step One
Put 3 tablespoons of butter in a pot on your stove top. We usually set our heat to low. Give it a few minutes until it has melted completely, or at least mostly.
Add in a full 16 ounce bag of Jet Puff Marshmallows. We use jet puff because they are generally the most consistent and texture and flavor. But you can use your favorite type of Marshmallow.
Stir the butter and marshmallows together until everything has melted. You should have a sticky, creamy, white blend.
If you want to speed step one up a little bit, you can always follow our microwave Rice Krispie Treats directions. They take around 2 - 3 minutes instead of 8 or more minutes.
- Throw your butter and marshmallows into a dish that is OK for microwave use.
- Toss it in the microwave for 30 - 60 seconds.
- Take it out and stir it up.
- Toss is back in for 30 seconds at a time, stirring in between each heating until the marshmallows and butter are melted.
Step Two
Once your butter and marshmallows are completely melted together, add in your rice krispies cereal. Take 6 measured cups of cereal and dump them directly into the melted marshmallows.
Use a spatula to stir the marshmallows and cereal together until everything is completely coated. Now set them aside and pull out your pan.
Step Three
Scoop the Rice Krispie Treats mix from the large stock pot and into the bottom of your 9 x 13 pan. Use your spatula to smash the treat mix into the bottom of the pan until everything is completely flat and even.
Set this pan to the side and allow to cool for about 15 to 20 minutes. Cooling makes it easier to cut them into squares later. You can cheat and put them in the refrigerator or even the freezer if you're feeling impatient.
Step Four
Now that your Rice Krispie Treats are cool, get out a sharp knife and get ready to cut them. We prefer to cut them into 2 inch by 2 inch squares. That should get you about 15 or 16 Rice Krispie Treat per pan.
Step Five
Now we get to the fun decorating part!
For this section you will need white cake frosting, black decorating gel, and decorative candy eyeballs.
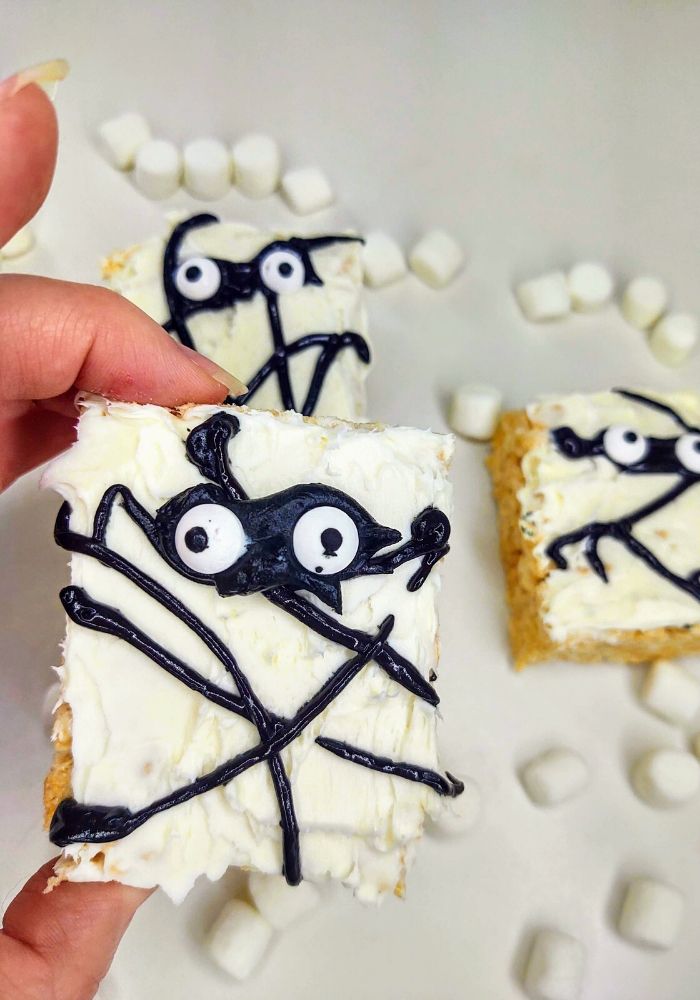
Start by putting white cake icing on the tops of all of your Mummy treats. Next, you'll take your black decorative gel and crisscross it across the top of your treat to look like the wrapping around a Mummy.
Be sure to put a little bit of extra gel around where you want the eyes to go. That will allow the candy decorative eyeballs to stick in place. Next, just put the eyeballs in the gel.
And that's all there is to it!

Mummy Rice Krispie Treats
Equipment
- 9x13 Pan
- Spatula
- large stock pot
Ingredients
- 6 Cups Rice Krispies
- 3 tablespoon Salted Butter
- 16 oz Marshmallows
- 1 black writing gel
- vanilla cake icing
- candy eyes
Instructions
- add the butter & marshmallows in a bowl and melt them together. This can be done in the microwave or on the stove top.
- add in Rice Krispies and mix thoroughly
- spread the mixture into a greased pan with a greased spatula.
- allow mixture to cool (about 30 minutes)
- cut in 2 x 2 inch squares
- apply vanilla icing to top of treat
- use black writing gel for mummy wraps
- add a candy eyes
- serve & enjoy!
Nutrition information provided is just an estimate and may vary based on specific ingredients used.